PassKey
KeePassXC
Adding a passkey for Duo in KeePassXC
This page explains how to create a passkey for Duo and save it in KeePassXC. The setup is done using the KeePassXC Browser extension.
Requirements:
1. KeePassXC is installed
2. You have a KeePassXC database that you can open
3. A supported browser must be installed and available
4. The KeePassXC Browser extension is installed in the browser
Open KeePassXC and unlock your database with your master password.
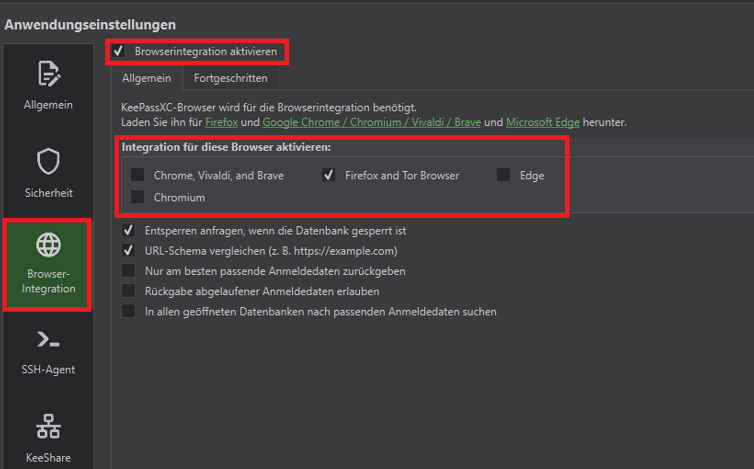
Now enable browser integration in KeePassXC. To do this, open the settings by clicking the gear icon.

Switch to the section “Browser-Integration” on the left. There, enable “Browser-Integration aktivieren” and then select the browser in which you want to use KeePassXC-Browser.
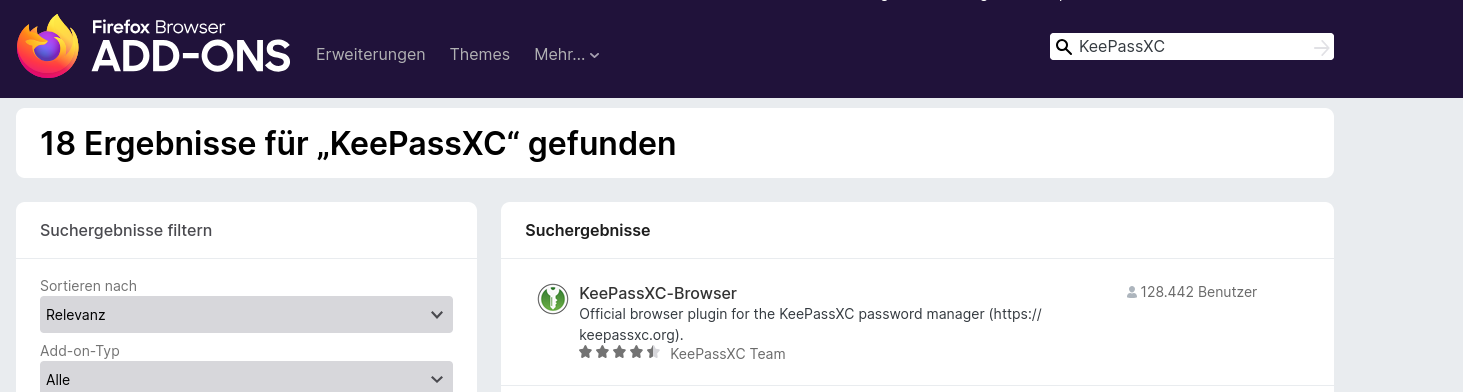
Then continue in the selected browser. Install the extension “KeePassXC-Browser” there if it is not already installed.
Search for KeePassXC-Browser and click “Hinzufügen”.
Then click “Hinzufügen”.

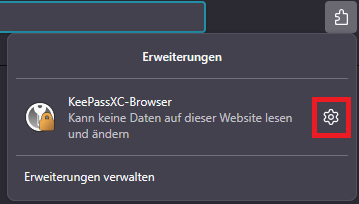
After installation, click the puzzle icon in the top right of the browser and then click the gear icon to open the extension settings.
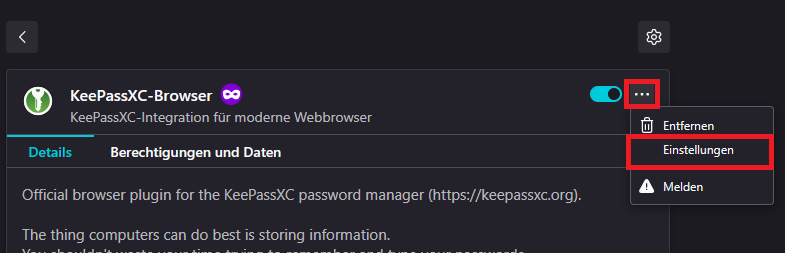
Then open the settings of the browser extension. To do this, click the menu on the right and then click “Einstellungen”.
Scroll in the settings to the “Passkeys” section. There, enable “Passkeys aktivieren” and then save the change.

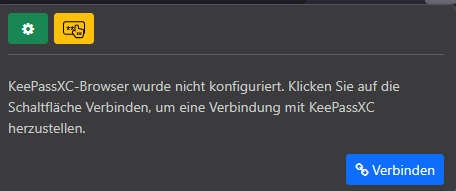
Then connect the browser add-on with KeePassXC. To do this, open the extension and click “Verbinden”.
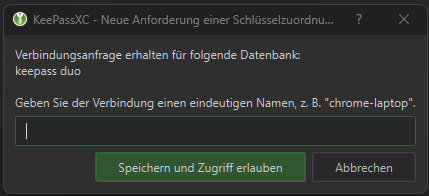
Then assign a name of your choice in KeePassXC and click “Speichern”.
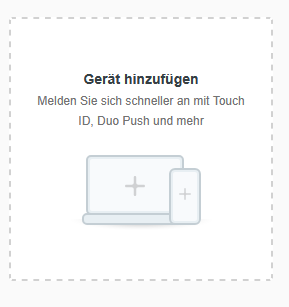
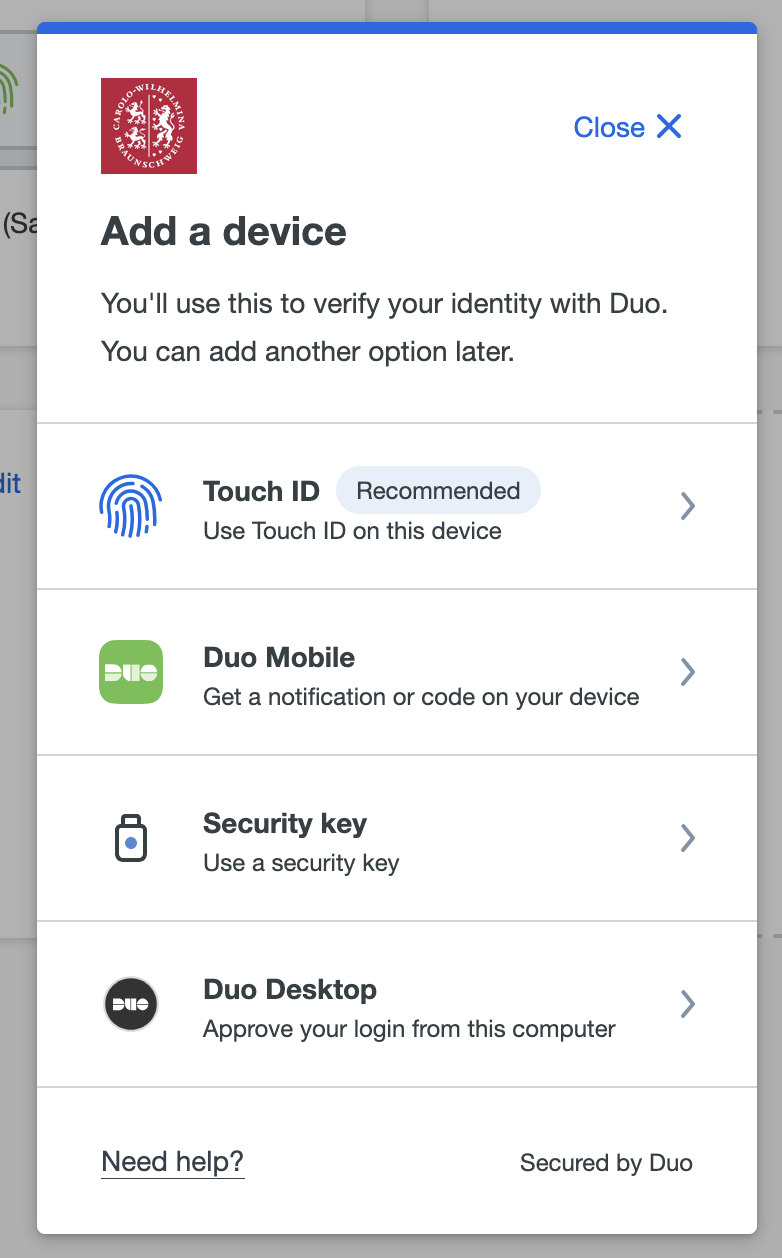
Now open Duo and add a new device. To do this, log in to the Duo portal as described on the device management page(Geräteverwaltung). Then click “Geräte hinzufügen”.
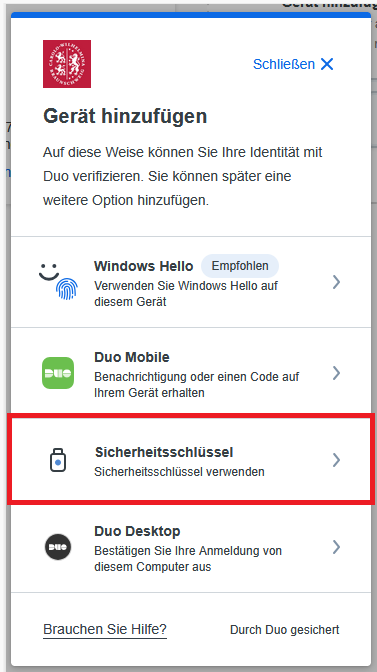
In the “Gerät hinzufügen” window, select the option “Sicherheitsschlüssel”.
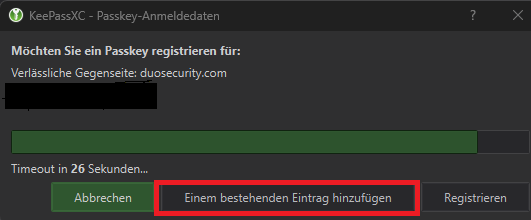
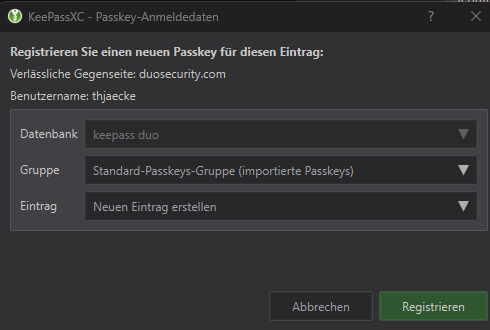
Then a KeePassXC window will open. There, you can either add the passkey to an existing entry or create a new entry. Then confirm the registration.
Then click “Registrieren”.
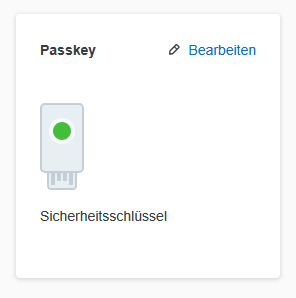
After successful setup, the new passkey will be displayed on the device management page. If you wish, you can then adjust the name via “Bearbeiten”.
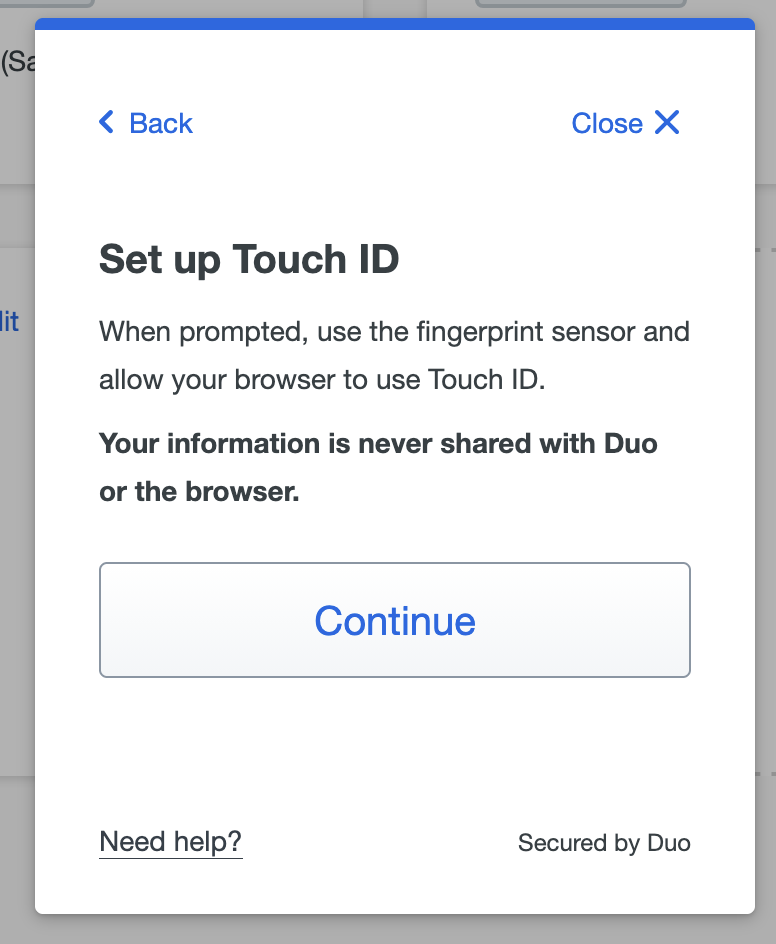
MacOS
Under macOS, the procedure is as follows:
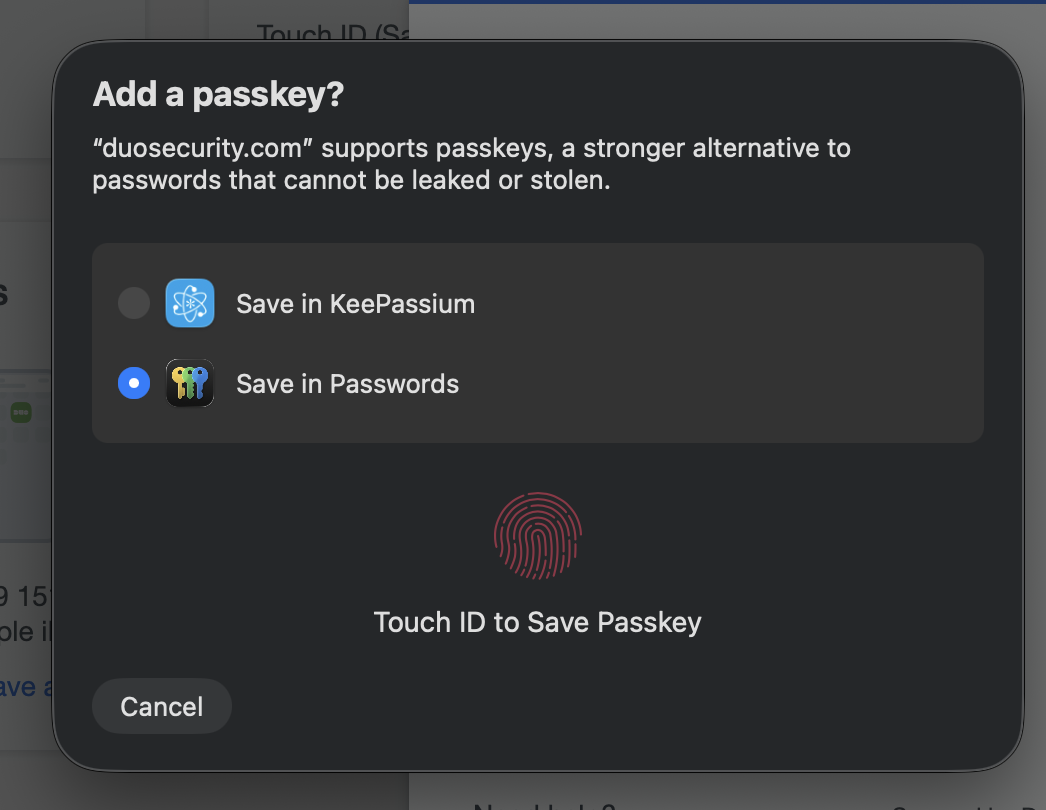
If you choose to store it in Apple Passwords and are logged in with an Apple ID, you can also use the passkey on other devices with the same Apple ID. This also applies in the reverse order when setting it up on an iPhone and using it on a Mac.