[EN] What changes with regard to videos will apply in the upcoming version of Stud.IP?
Playlists
In the upcoming version of Stud.IP, videos will be organised into playlists, which will significantly improve navigation and clarity within a course.
In the current version of Stud.IP, videos are assigned to an Opencast series. An Opencast series can be linked to several courses in Stud.IP. Videos are permanently associated with an Opencast series, which means that the permissions and publication / visibility of videos are largely determined by this assignment. For this reason, a video needs, until now, to be uploaded several times if it is to be assigned to more than one series.
In the upcoming version of Stud.IP, videos will be organised into playlists within a Stud.IP course. A video can appear in several playlists without being moved or duplicated in Opencast. So you only need to upload a video once and can add it to as many playlists as you like. The order, visibility and sharing settings can be managed for each playlist.
Consequently, in the current version of Stud.IP, series are Opencast-based, relatively fixed containers, whilst playlists in the upcoming version of Stud.IP are Stud.IP-based, more flexible compilations of videos.
Create playlists and add videos
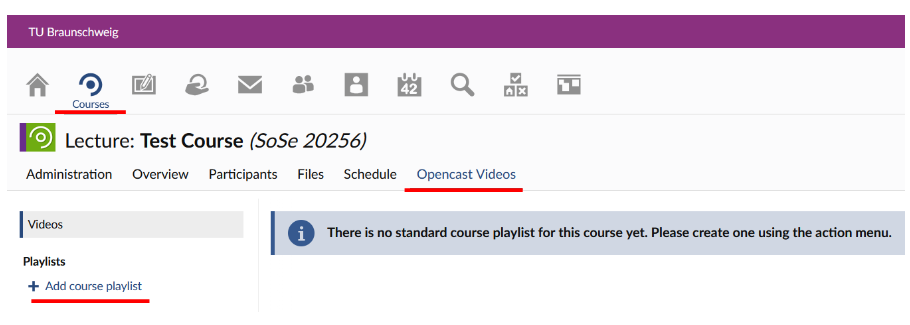
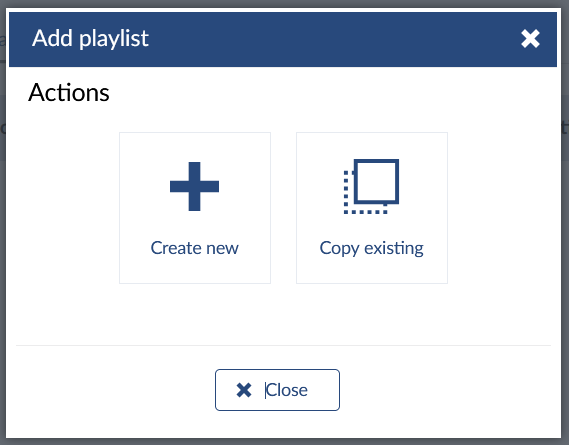
By clicking on "+ Add course playlist", you can create a new playlist or copy an existing one in the dialogue box that opens.
Note: It is a good idea to include the course name and the semester in the playlist name, as this will ensure that, when you later assign individual videos to playlists and all your playlists are displayed for selection, you will be able to assign the playlist unambiguously.
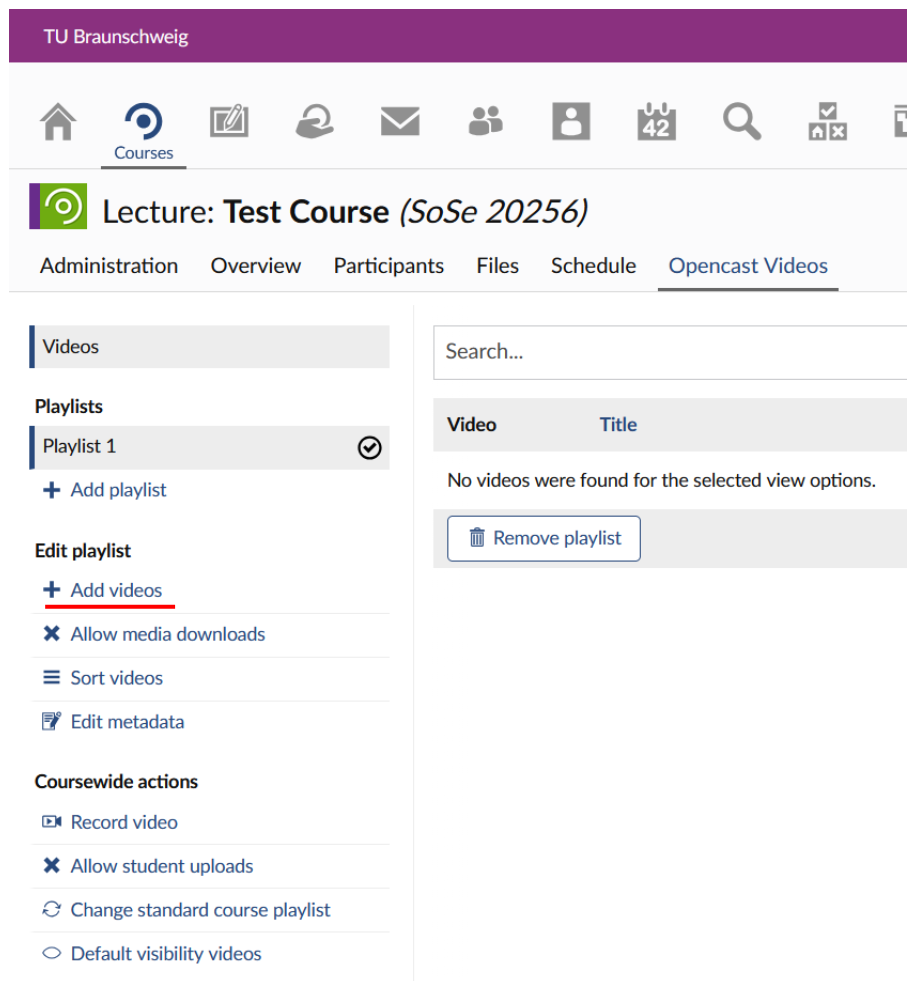
A new playlist called "Playlist 1" has been created.
You can now add videos to the playlist by clicking on "Add videos":
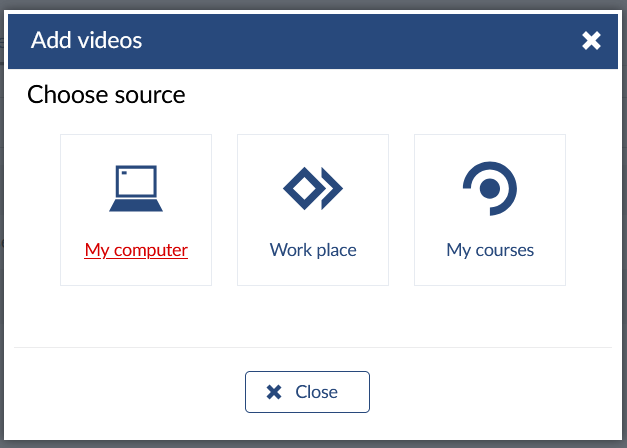
In the dialogue box that opens, you can now add videos from three different sources:
- My computer
- Work place: your "Work Place" in Stud.IP, where your videos are located under "Opencast Videos"
- My Courses: here, in the dialogue box that opens, you can select one of your courses in Stud.IP and then choose from its videos
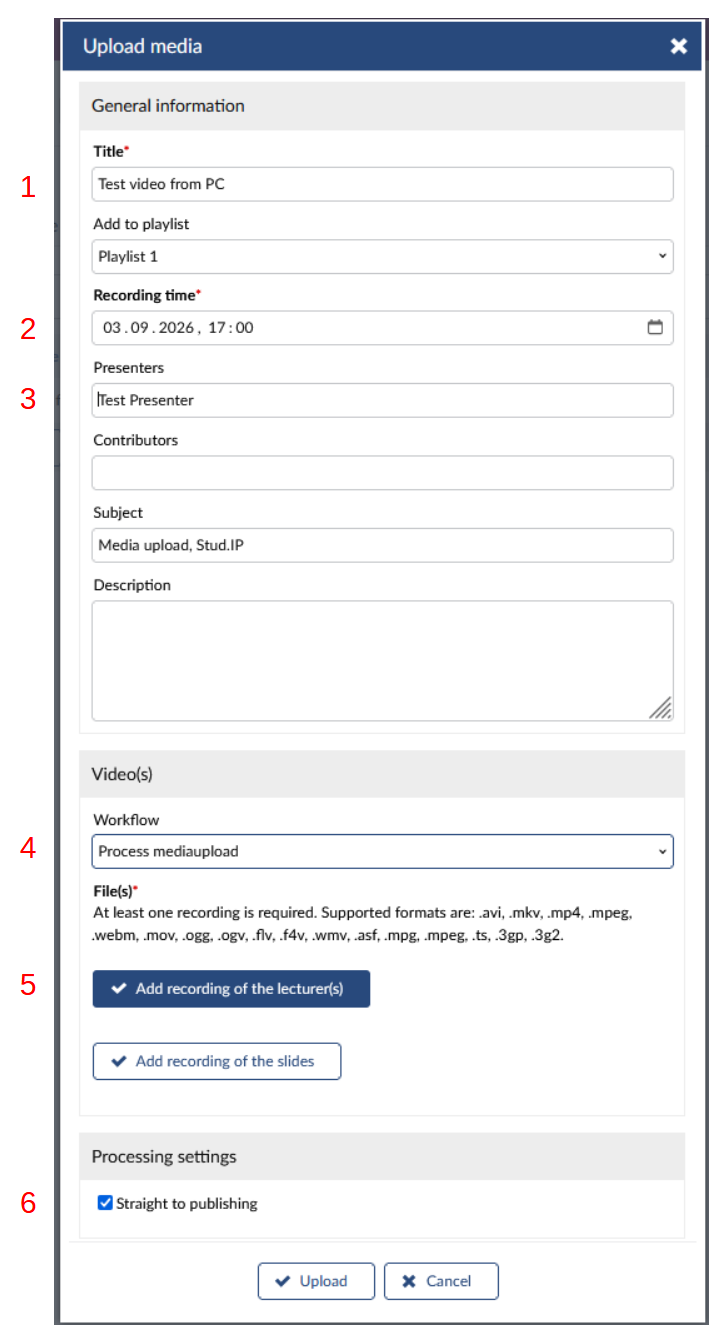
The following section describes how to upload a video from your computer (see the screenshot below):
- Here you can enter any title
- Here you can adjust the date and time if required
- Here you can add the presenter
- To select the video processing workflow, click on the down arrow on the right-hand side of the field to choose the "Process mediaupload" workflow
- Here you can select the video you want from your PC
- In the processing settings, leave "Straight to publishing" activated
Clicking "Upload" will then add the video to your playlist. It may take a while for the video to be processed and made available for playback in Stud.IP. Refresh your browser window from time to time to see if the video has been processed yet.
Further actions for course videos
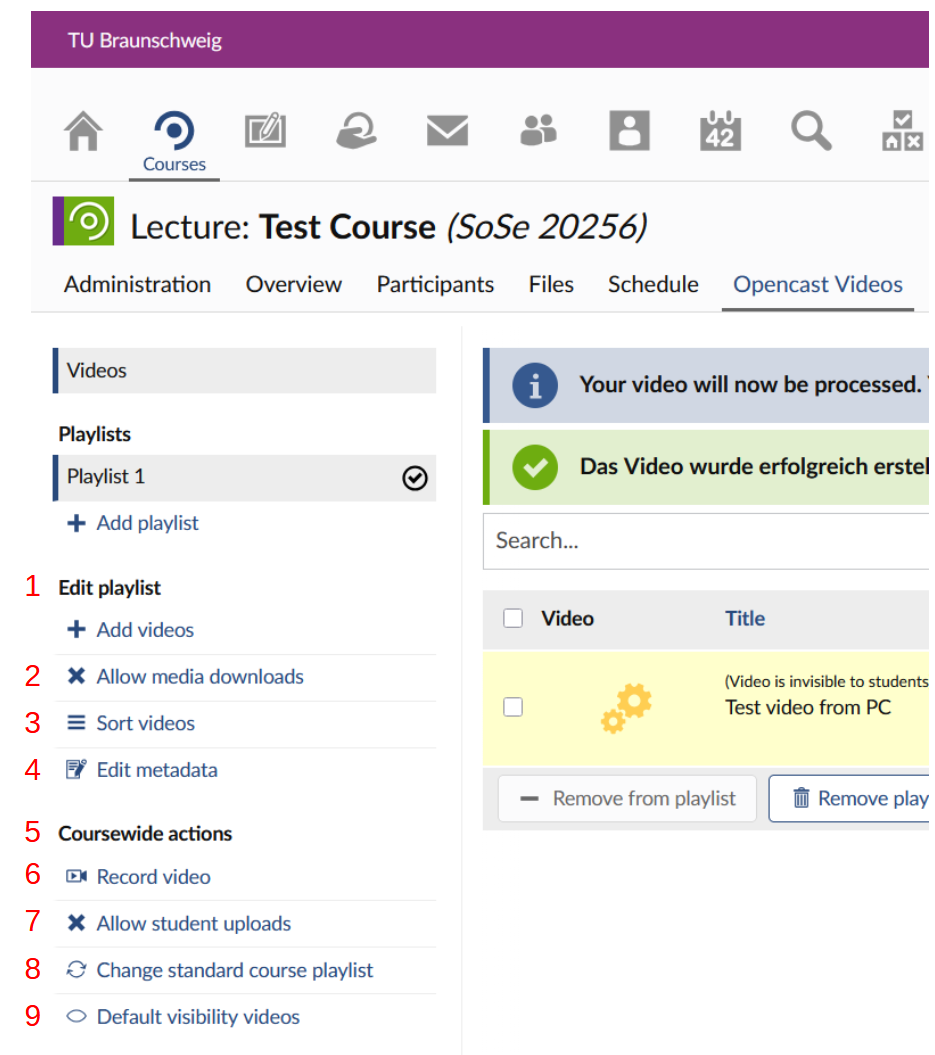
In your events, you can carry out further actions under the "Opencast Videos" tab (see the screenshot below):
- You can edit the currently active playlist and configure differing settings for different playlists:
- Here you can allow or prohibit media downloads for each playlist
- Here you can sort your videos within the active playlist
- Here you can edit the metadata of the active playlist by assigning tags to it
- For coursewide actions, you can choose from the following options:
- Here you can record a video using the "Opencast Studio" tool. You can choose your screen, your camera or both as the source. You can also choose whether to record with or without sound.
- Here you can set whether students are allowed to upload videos to your course
- Here you can change the standard course playlist for the course
- Here you can set the default visibility settings of your videos:
- Default system settings
- Videos visible to students by default
- Videos invisible to students by default
Actions for individual videos
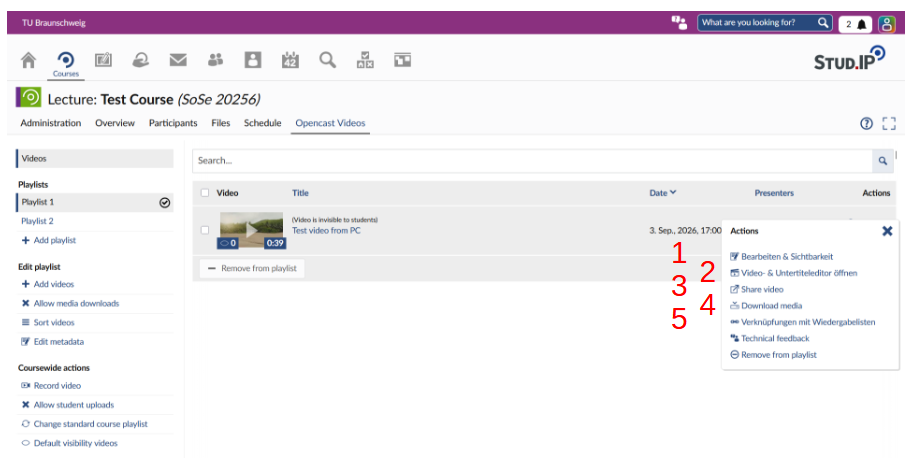
By clicking on the three dots arranged vertically one above the other on the right-hand side of a video row, you can carry out actions for each of your individual videos (see the screenshot below):
- Here you can, amongst other things, edit the title, presenter, description and tags of the video. You can also set the visibility of the video within the course.
Important note: the scheduled visibility feature for videos is currently not working properly. Please set your video to visible or invisible manually, without timestamp. - Here you can edit your video in a video editor
- Here you can share your video, for example by granting individual users read or write permissions
- Here you can download your video, in different resolutions if required
- Here you can add your video to more playlists