# iPhone/iPad an Exchange anbinden
---
1\. Rufen Sie auf Ihrem iPhone oder iPad die **\[Einstellungen\]** auf.
2\. Klicken Sie oben auf die **Suche** und suchen nach **Mail**.
[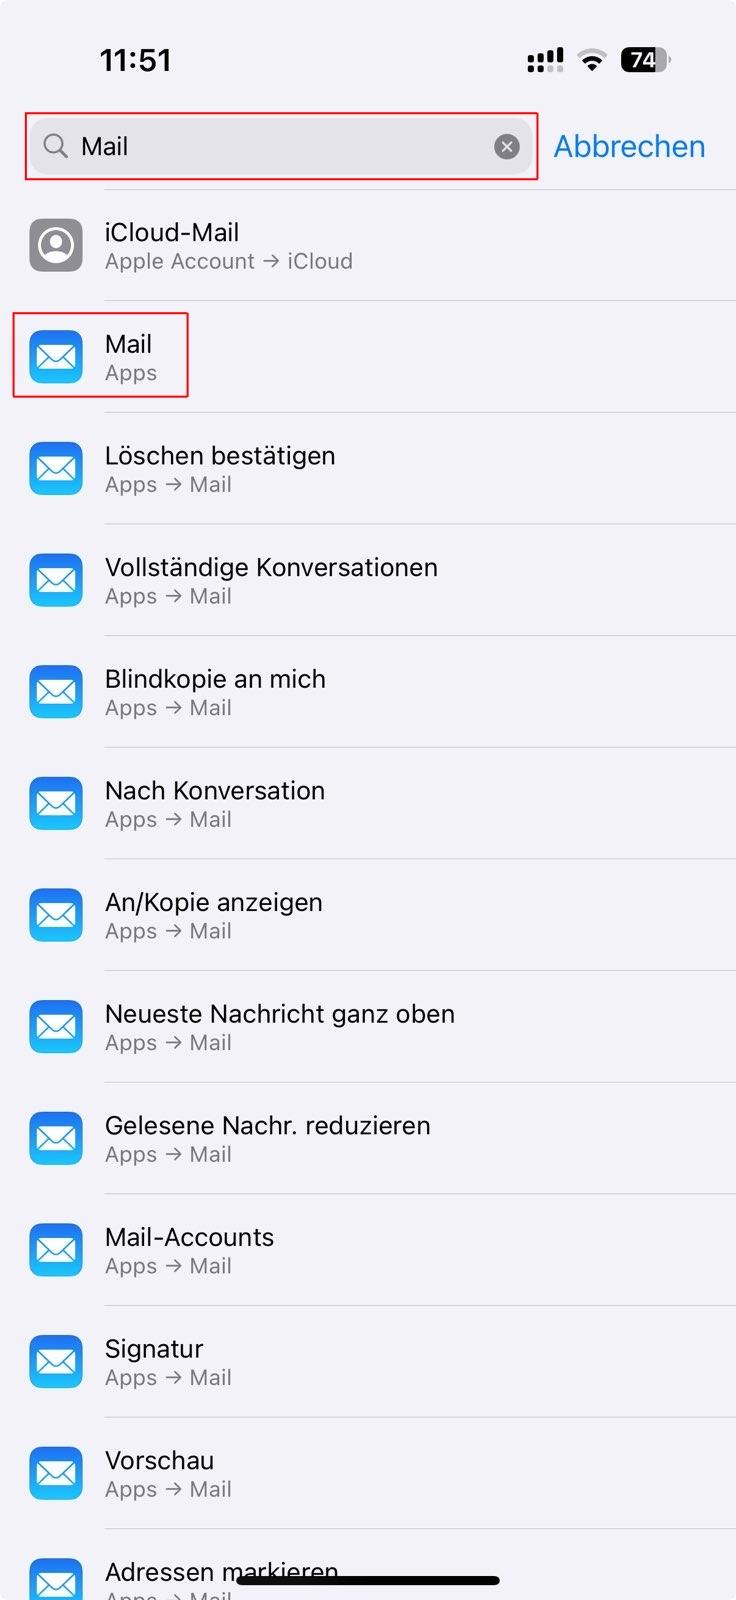](https://books.rz.tu-bs.de/uploads/images/gallery/2025-02/TkFo8TTE1S33YcFm-iphonexchange1.jpeg)
3\. Wählen Sie **\[Mail-Accounts\]** an.
[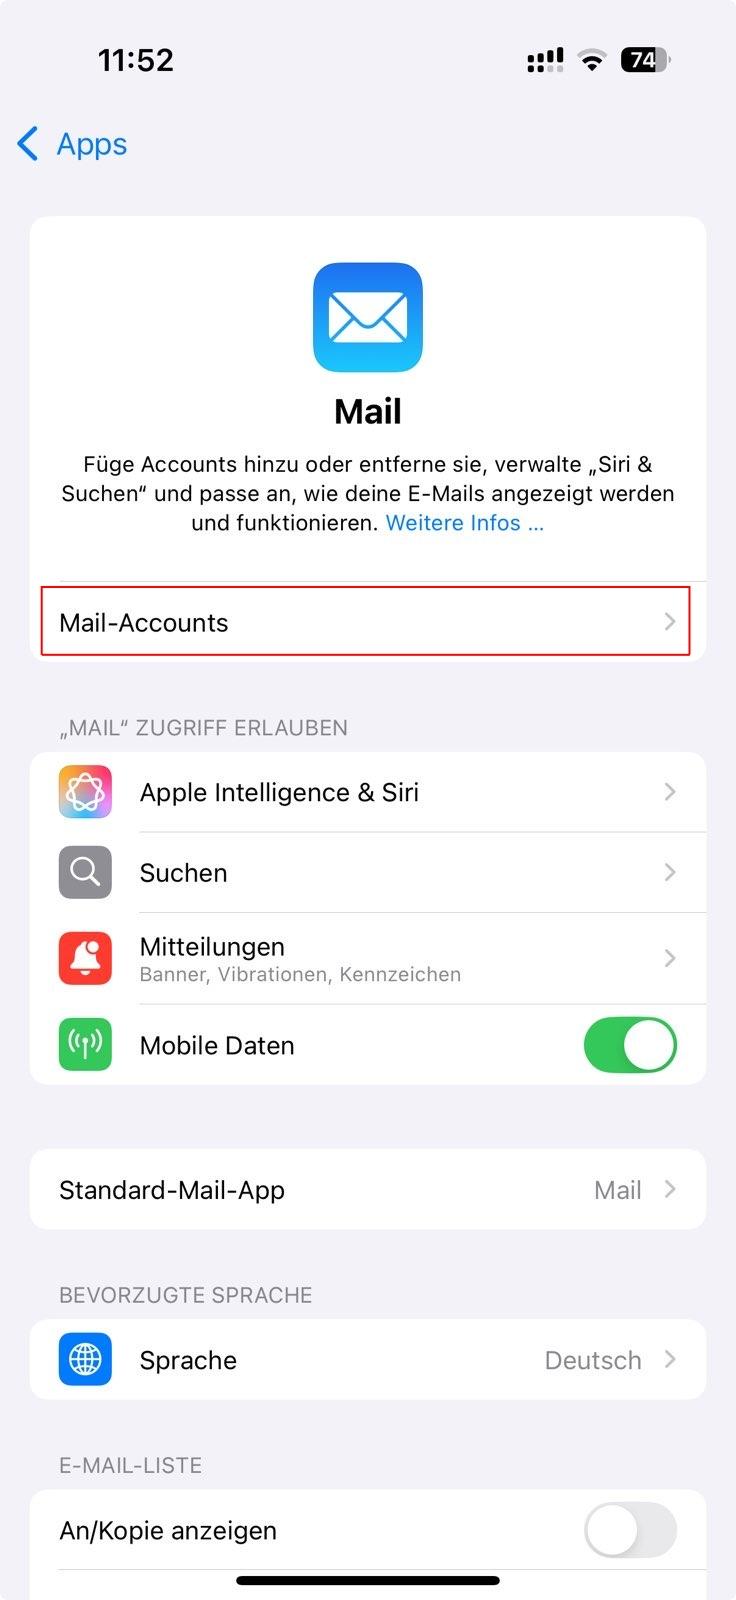](https://books.rz.tu-bs.de/uploads/images/gallery/2025-02/sQ8iMqXvEf9RrduN-iphonexchange2.jpeg)
4\. Wählen Sie **\[Account hinzufügen\]** an.
[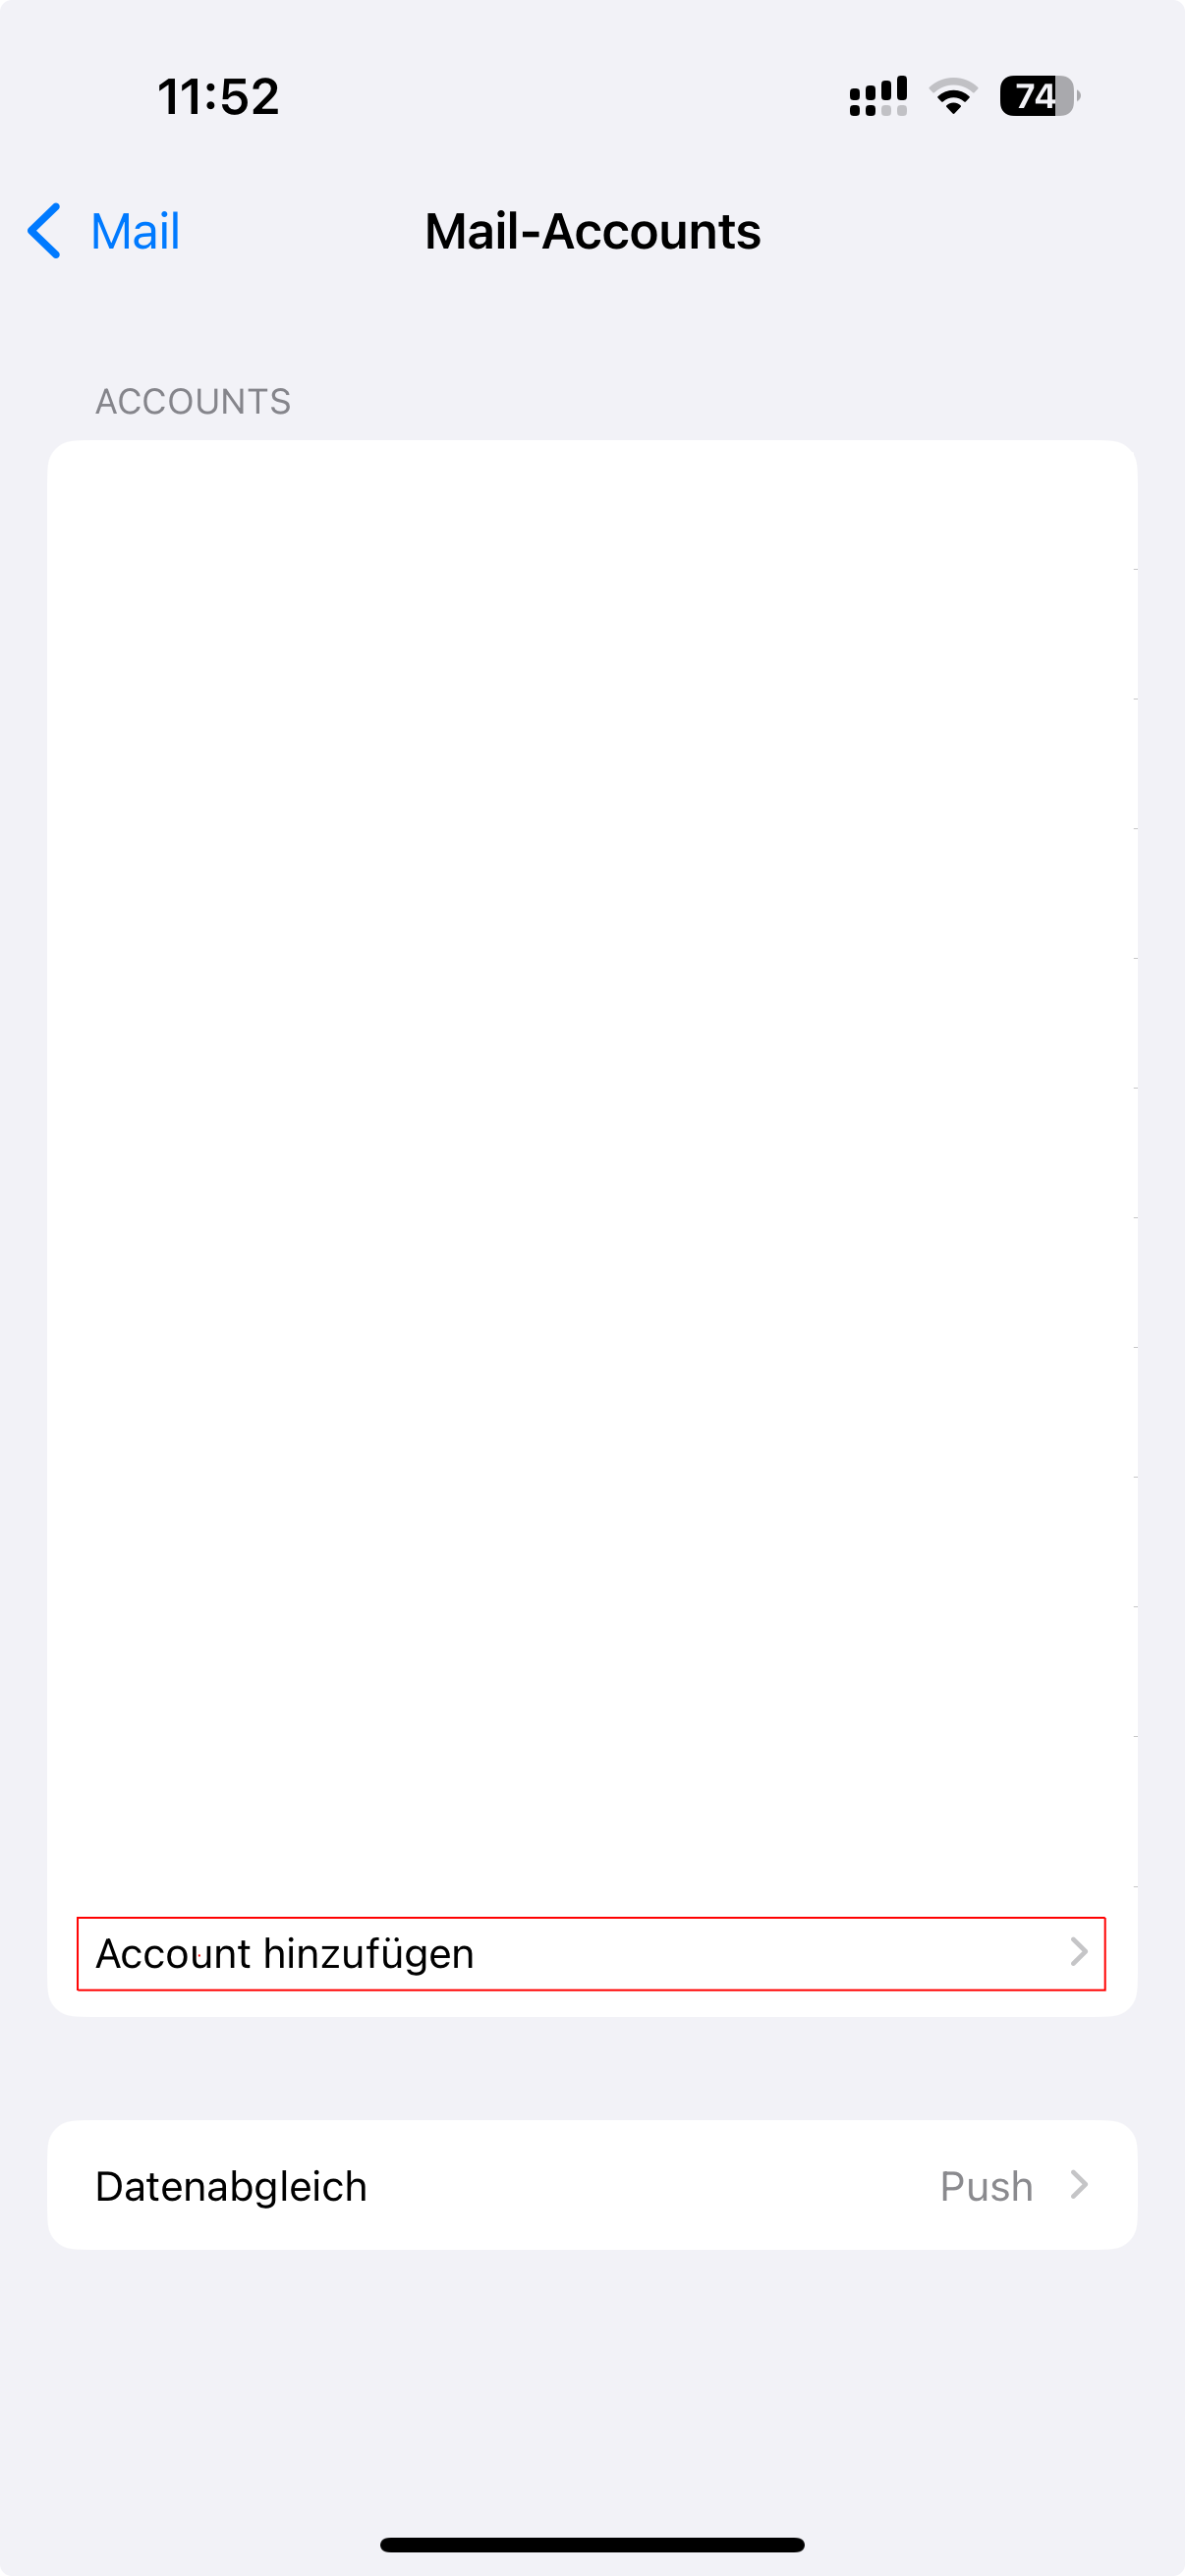](https://books.rz.tu-bs.de/uploads/images/gallery/2025-02/PRokA4trNjDIm350-iphonexchange3.png)
5\. Wählen Sie **\[Exchange\]** aus.
[](https://books.rz.tu-bs.de/uploads/images/gallery/2025-02/7xDFpNccGHYN5gZL-iphonexchange4.png)
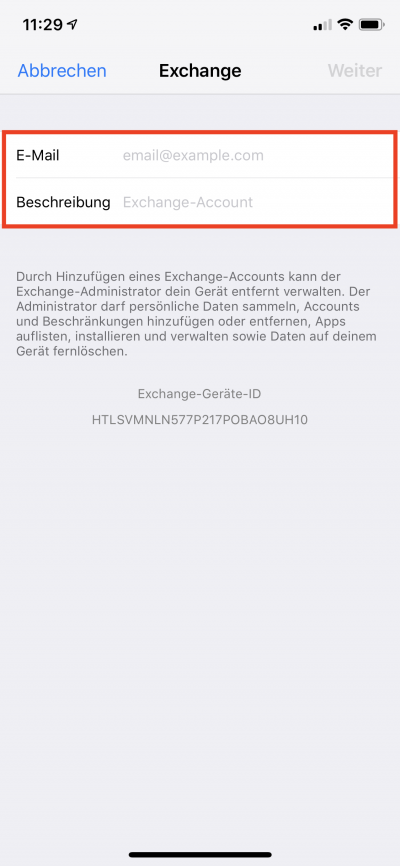
6\. Machen Sie hier bitte folgende Angaben:
- **E-Mail:** *Ihre E-Mail-Adresse*
- **Schreibung:** *Beliebige Beschreibung*
Klicken Sie auf **\[Weiter\]**.
[](https://books.rz.tu-bs.de/uploads/images/gallery/2024-05/ciM3SBuNcPkD2jLi-mail-e-mail-adresse-und-beschreibung.png)
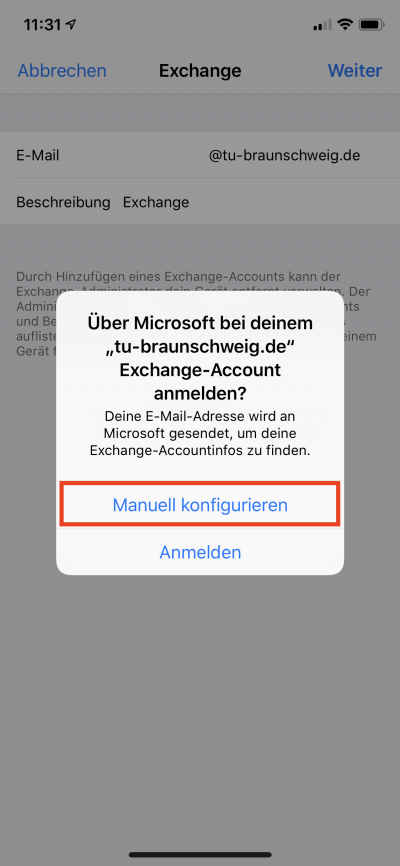
7\. Tippen Sie in dem Popup auf **\[Manuell konfigurieren\]**.
[](https://books.rz.tu-bs.de/uploads/images/gallery/2024-05/2CSyV7KEf3MkpvQU-grafik.png)
8\. Klicken Sie nach Eingabe des Passwortes **\[Weiter\]**.
[](https://books.rz.tu-bs.de/uploads/images/gallery/2024-05/aT0x1c78vrJMblSM-mail-weiter-nach-passworteingabe.png)
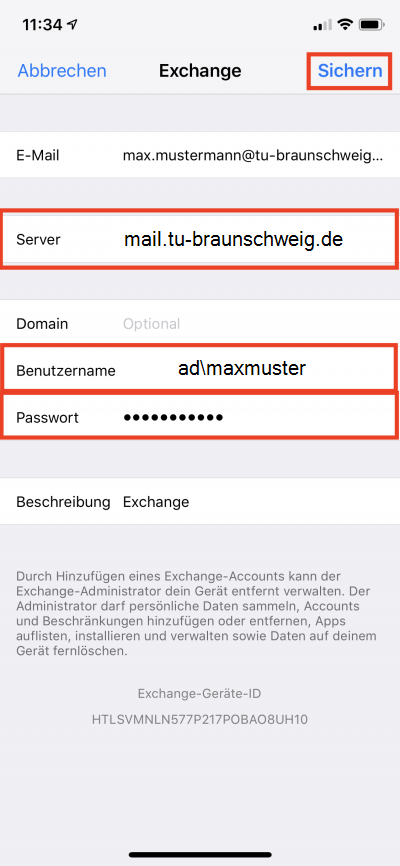
9\. Geben Sie nun folgende Daten ein:
- **Server:** mail.tu-braunschweig.de
- **Benutzername:** ad\y01234567 oder ad\Mitarbeiterkennung
- **Passwort:** *Ihr Passwort*
Drücken Sie nach Eingabe der Daten auf **\[Sichern\]**.
[](https://books.rz.tu-bs.de/uploads/images/gallery/2024-05/nHR6gIDyTKRIkA5G-grafik-1.png)
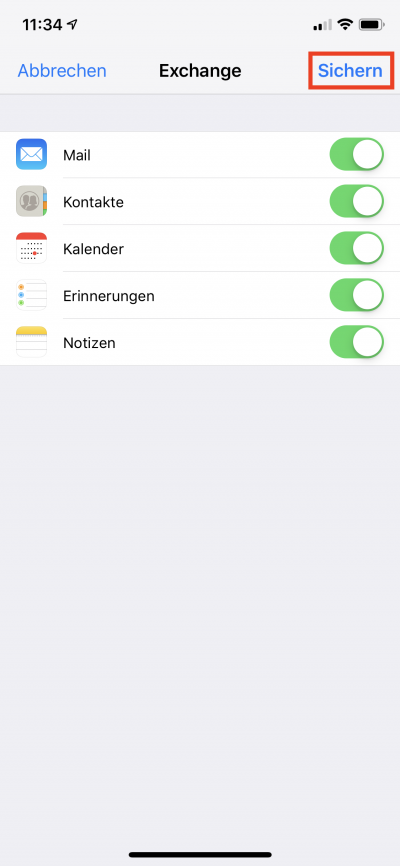
10\. Wählen Sie aus was Synchronisiert werden soll und klicken Sie anschließend auf **\[Sichern\]**.
[](https://books.rz.tu-bs.de/uploads/images/gallery/2024-05/sLwxj937ZTWd9nqM-mail-einrichtung-abschliessen.png)
Nun haben Sie über Apple Mail Zugriff auf Ihr TU E-Mails.